18 Jul How to Create a Page in WordPress
Want to know how to create a page in WordPress? Do you need to know how to add and arrange text and images? If you are looking to get content on your site, then this post will help you get there! This post also includes additional tips and tricks to make your WordPress Page shine. Enjoy!
Login to Your WordPress Website “Admin Console”
1. Got to “yoursite.com/wp-admin” and enter your username and password

How to Add a New WordPress Page
1. Once you have logged into the admin console, click on “Pages” in the left menu.

2. Now click on “Add New” at the top of the next page.

3. Enter a title, add content (text and images) and click the “Publish” button. Your page is live on your site! Read the next section to lean how to add content to your page.

How to Add Text to Your WordPress Page
1. In your new page, click on the “Add Element” button. Note: If you don’t see this button click on the “Backend Editor” button underneath the title and make sure it says “Classic Mode”. This option will only show if you have the drag-and-drop page editor plugin called “Visual Composer”. This plugin comes pre-installed on all Bridge theme demos.

2. Select the option titled “Text Block“. Of course, you can choose any of the elements listed. You will notice that each element has it’s own settings and abilities. Test them out to see what looks best on your page!

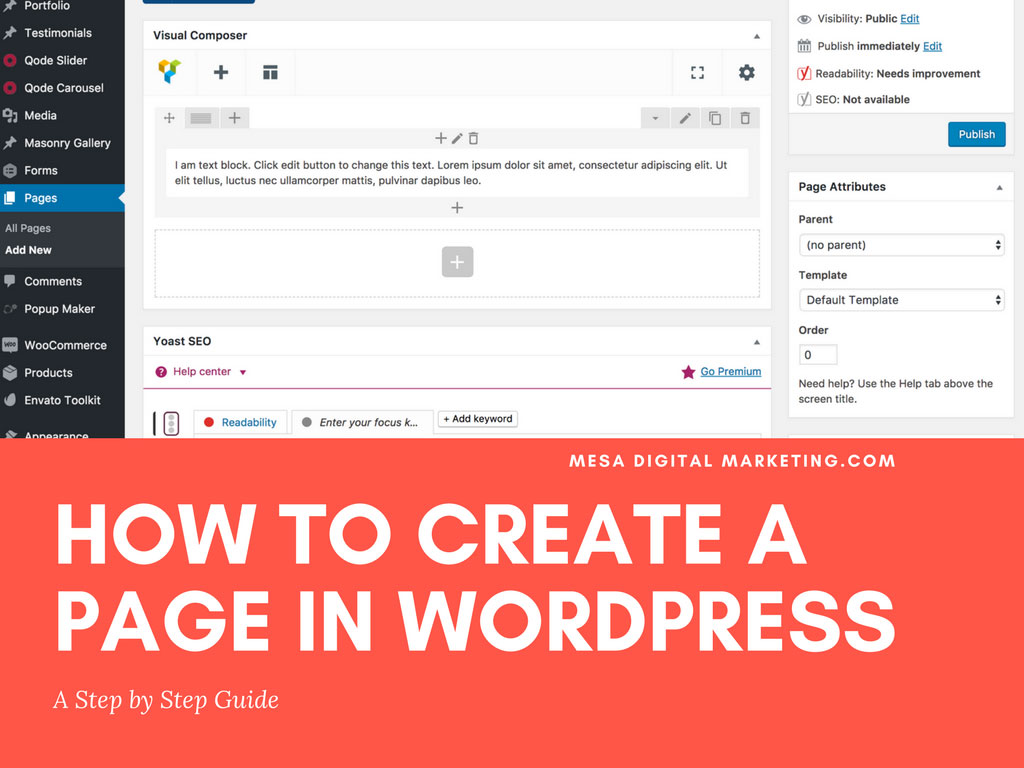
3. To add more content, click on the 1. “+” button. The icon shown by arrow 2. duplicates the element(s) inside of the “row” (grey box with text inside the white box). The icon show by arrow 3. will trash the row.

4. To create columns click on the icon indicated by the arrow in the image below.

5. Make sure to click “Update” or “Publish” in the top right of the page to save your additions and changes.

How to Add Images to Your WordPress Page
1. In your new page, click on the “Add Element” button. Note: If you don’t see this button click on the “Backend Editor” button underneath the title and make sure it says “Classic Mode”. This option will only show if you have the drag-and-drop page editor plugin called “Visual Composer”. This plugin comes pre-installed on all Bridge theme demos.

2. Select the option titled “Single Image“. You can also select “Image Gallery” to showcase multiple images. That option works great but be aware that it does require a bit more setup than a single image.

3. You can title your image if you want or just leave it blank. Click the “+” icon to add or upload an image.

4. Click the “Media Library” to select images already uploaded to your WordPress site. To upload a new image, click the “Upload Files” option.

5. Once you have selected your image, change the size from thumbnail to full. You manually adjust the image size after it has been added. Also, make sure to select the image alignment in these options as well.

6. To add more content, click on the 1. “+” button. The icon shown by arrow 2. duplicates the element(s) inside of the “row” (grey box with text inside the white box). The icon show by arrow 3. will trash the row.
7. To create columns click on the icon indicated by the arrow in the image below.

8. Make sure to click “Update” or “Publish” in the top right of the page to save your additions and changes.
Extra Help
If you are looking for more advanced customization to your pages, contact us for additional help. Mesa Digital Marketing works everyday to help customers build and customize their professional websites.
If you are looking for help with marketing your products and services, give us a call! We also help with Facebook ads and marketing automation. We look forward to helping your business get to the next level!
Sorry, the comment form is closed at this time.